

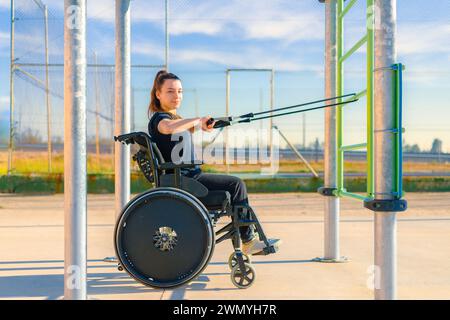
Let’s face it — the gym was never really designed with everyone in mind. Walk into most commercial fitness centers, and you’ll see a sea of treadmills, leg presses, and benches that assume a certain level of mobility. For wheelchair users, that traditional setup can feel less like a training ground and more like an obstacle course. But here’s the good news: the landscape is shifting. Adaptive fitness equipment isn’t just a niche afterthought anymore — it’s a thriving segment of the industry, and honestly, it’s about time.
Whether you’re a seasoned athlete with a spinal cord injury, someone living with multiple sclerosis, or an amputee who uses a chair daily, the right equipment can be the difference between frustration and genuine progress. And I’m not just talking about modified dumbbells. We’re looking at a whole ecosystem of machines, tools, and tech that respect your body’s reality while still pushing your cardiovascular system and muscles to adapt. Let’s unpack what’s out there, what actually works, and how to avoid wasting money on gimmicks.
Why “One Size Fits All” Fails in Adaptive Training
Here’s the deal — wheelchair users aren’t a monolith. Your level of injury, your trunk control, your grip strength, even your sitting balance… all of these variables change which equipment is safe and effective. A C5 injury gives you shoulder and elbow flexion but limited wrist control. A T10 injury? You’ve got full upper body strength but maybe zero core stability below the chest. So when someone says “just use a hand cycle,” well… that’s like telling a sprinter to try ballet. Sure, both are athletic. But they’re not interchangeable.
That’s why the best adaptive equipment offers adjustable resistance, multiple grip options, and seat-back support that doesn’t compromise range of motion. You need machines that adapt to you, not the other way around.
The Heavy Hitters: Core Adaptive Machines
Let’s break down the equipment categories that are actually worth your attention. I’ve tested some of this stuff — or at least watched clients sweat through it — so this comes from a place of practical observation, not just spec sheets.
1. Upper Body Ergometers (UBEs) — The Unsung Hero
You’ve probably seen these — they look like a bike pedals mounted at chest height. But don’t let the simplicity fool you. A quality UBE, like the SCIFIT PRO2 or NuStep T4r, allows for reciprocal arm movement that mimics a natural push-pull pattern. The key is finding one with a seat that slides forward and backward, so your elbows have a slight bend at full extension. If your shoulders roll forward when you reach, the seat is too far back. Period.
What to look for: Magnetic resistance (quiet, smooth), adjustable crank arm length, and a chest strap option if you have lower trunk stability. And honestly, the display matters less than you think. You’re not there to watch TV — you’re there to move blood.
2. Multi-Station Cable Machines with Floor-Level Pulleys
This is a game-changer. Traditional cable machines have pulleys that start at shoulder height or higher, which forces wheelchair users into weird compensatory patterns. But adaptive-friendly setups — like the FreeMotion Functional Trainer or even a well-designed Powertec LeverGym — allow you to adjust the pulley to below your shoulder line. That means you can do chest presses, rows, and even wood chops without having to lean sideways off your chair.
Pro tip: If your gym doesn’t have one, look for a portable resistance band anchor that hooks into a door frame at knee height. It’s not the same, but it’s a solid backup when you travel.
3. The Wheelchair-Accessible Rower
Now, this one’s tricky. Most rowers require you to slide on a seat, which is impossible if you can’t transfer. But the Concept2 SkiErg is a different beast — you stay seated, and you pull a cord down and away using a rope that mimics cross-country skiing motions. It’s brutal for the lats and rear delts, and it doesn’t require any leg drive. Some users also love the Vasa Trainer, which is a swim-bench style machine that lets you lie prone or sit upright while pulling resistance straps. Both options give you that “full body” feel without the lower body demand.
Don’t Forget the Accessories: Small Tools, Big Impact
Sometimes the most valuable equipment isn’t a giant machine. It’s the stuff that fills the gaps. Let’s talk about the unsung accessories that make training safer and more effective.
- Transfer boards with non-slip surfaces — sounds boring, but a good board prevents the “butt shuffle” that wreaks havoc on your shoulders during setup.
- Wheelchair-specific bench straps — these are wide, padded belts that secure your pelvis to the bench. If you’re doing any overhead pressing, this is non-negotiable for safety.
- Grip aids like lifting hooks or wrist wraps with D-rings — for those with limited hand function, these let you push or pull without crushing your fingers on a bar.
- Adjustable-angled push-up blocks — you can place them on a table or the floor, and they allow for a neutral wrist position if you have some weight-bearing ability.
And here’s a small but mighty one: a pair of padded gloves with open fingertips. You wouldn’t think it, but friction burns on the palms are the number one reason new wheelchair lifters skip their second session. Trust me on that.
Smart Tech and Data: The Quiet Revolution
Wearables are getting more inclusive, though it’s been slow going. The Apple Watch Ultra and some Garmin models now have wheelchair-specific tracking that counts pushes instead of steps. That’s nice for daily activity, but for actual strength training, you might want to look at EMG-based biofeedback sensors like the mPower or Delsys Trigno — they attach to your skin and show you which muscles are actually firing during a lift. This is huge for people with partial paralysis, because you can see if you’re compensating with your traps instead of your pecs.
Is it a bit clinical? Sure. But knowing your muscle activation patterns is like having a map in a foggy forest. You can’t fix what you can’t see.
Budget vs. Premium: What’s Actually Worth It?
Here’s where I’ll be blunt. You don’t need a $10,000 robotic exoskeleton to get a good workout. In fact, some of the most effective training happens with free weights, resistance bands, and a sturdy bench. But there are two areas where spending more genuinely pays off:
- Seating systems. A cheap stool that wobbles is a disaster waiting to happen. Invest in a heavy-duty, adjustable-height bench with a wide base. Look for one rated for at least 500 lbs.
- Resistance that doesn’t jerk. Elastic bands with cloth covers are fine, but they degrade over time. A magnetic resistance machine (like a UBE) offers constant tension without the snap-back risk.
For everything else — honestly, start second-hand. Check local rehab hospitals that sell used equipment, or online marketplaces. Many people buy adaptive gear after an injury, use it for six months, and then realize they prefer swimming. Their loss can be your win.
Setting Up Your Home Gym: A Practical Checklist
If you’re training at home, spatial layout matters more than the equipment itself. Here’s a quick mental walkthrough. You need a clear turning radius of at least 60 inches for your chair. You need a mirror — not for vanity, but to check your form without craning your neck. And you need a floor that isn’t carpeted, because wheels sink into plush carpet and mess with your alignment.
| Equipment | Best For | Approx. Cost (New) | Space Needed |
|---|---|---|---|
| SCIFIT PRO2 UBE | Cardio, arm endurance | $3,500 – $5,000 | 4 ft x 5 ft |
| Powertec LeverGym | Compound lifts, chest, back | $1,200 – $1,800 | 6 ft x 6 ft |
| Concept2 SkiErg | Total upper body power | $1,000 – $1,200 | 2 ft x 4 ft (wall mounted) |
| Adjustable bench (500 lb capacity) | Dumbbell work, core | $300 – $600 | 4 ft x 2 ft |
| Resistance band set with door anchor | Portable strength, rehab | $50 – $150 | Minimal |
Notice I didn’t include a “wheelchair treadmill” — that’s because they’re rare, expensive, and most users prefer a hand cycle or a UBE for cardio anyway. Don’t let a salesperson convince you otherwise.
Common Mistakes (Learn From My Clients, Not Your Own Pain)
First mistake? Ignoring your shoulders. Wheelchair users already have a high rate of impingement and rotator cuff issues from daily pushing. So if you add in bench pressing without balancing it with horizontal rowing, you’re cooking up an injury. The rule of thumb: for every pressing movement, do two pulling movements. Seriously. Write that down.
Second mistake? Strapping yourself down too tight. Some trunk stability is good, but if you’re completely rigid, you’re not training your core to react. That’s like doing math with a calculator forever — you never learn to calculate in your head. Use a loose strap for lighter lifts and tighten up only for heavy sets.
Third mistake? Forgetting about bone density. Below the level of injury, bones lose density fast. You can’t do weight-bearing exercises on your legs, but you can do impact-free resistance training that stimulates bone growth through muscle pull. That means heavy (but safe) loading on your arms and shoulders actually helps your hips