

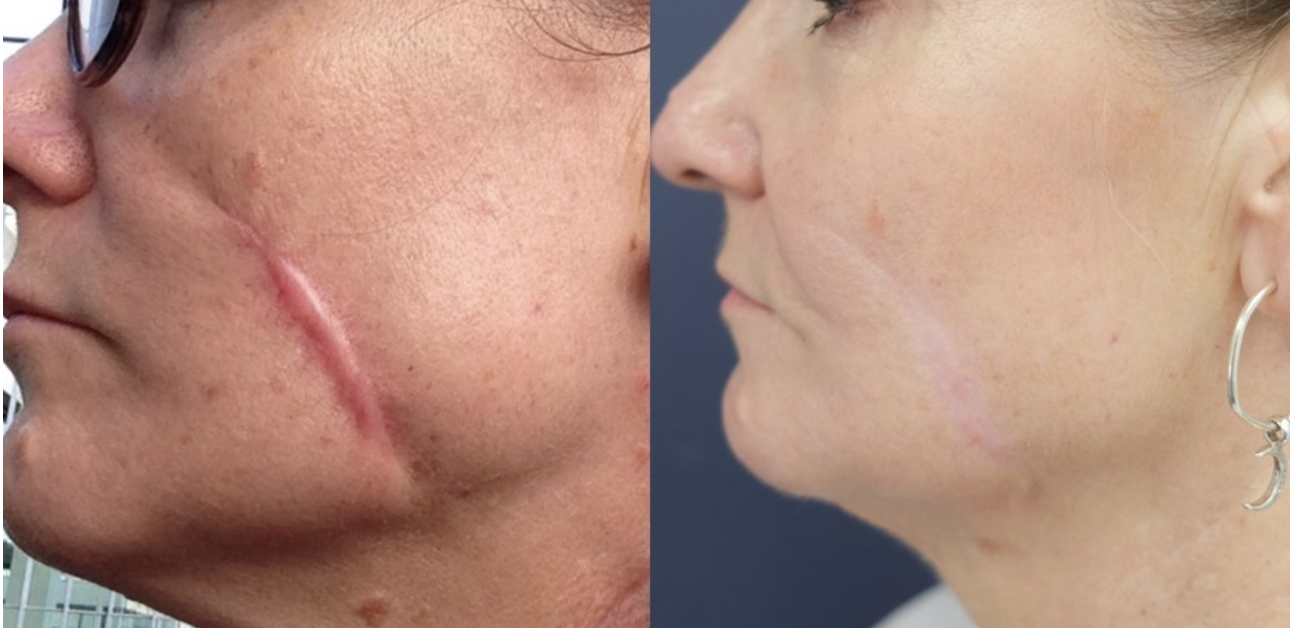
Let’s be real for a second. You’ve waited a long time for this. The day you finally look down and see a chest that feels like yours? That’s a milestone. But then, life throws a curveball — scars. Not the end of the world, not even close, but for many folks, scar management becomes this quiet, persistent thought. It’s not about vanity. It’s about feeling whole. And honestly? You deserve to feel good in your skin.
Here’s the deal: top surgery scars are inevitable, but how they heal is largely in your hands. Not entirely, sure — genetics play a role. But with the right techniques, you can nudge your body toward flatter, lighter, less noticeable scars. Let’s break down what actually works, what’s a waste of money, and how to build a routine that fits your life.
First, Understand What You’re Working With
Scar formation isn’t random. It’s your body’s collagen factory going into overdrive. Think of it like a patch job on a favorite jacket — the fabric weaves together, but the repair looks different from the original. For some, scars stay pink and raised for months. For others, they fade to thin white lines within a year. Neither is “wrong,” but your approach should adapt to your skin type.
Your surgeon’s technique matters too. Double incision, peri-areolar, keyhole — each leaves a different footprint. Double incision scars run along the bottom of the pec line, and they’re the most common target for minimization. But here’s the thing: even the best surgeon can’t guarantee a perfect outcome. That part’s on you, your body, and the aftercare you commit to.
The First 6 Weeks: The Golden Window
You’ve just come out of surgery. You’re swollen, tired, maybe a little overwhelmed. But this is when the foundation for scar healing gets laid. No, you can’t start rubbing fancy creams on day two. But you can control the basics:
- Keep the incision lines still. Movement pulls the wound edges apart. That’s how scars widen. Use your compression binder as directed — it’s not just for swelling, it’s for keeping tension off the line.
- No lifting, no reaching. I know, you feel fine. But internal healing lags behind how you feel. Give it six full weeks before any upper-body effort.
- Moisture is your friend. Once your surgeon clears you, apply a thin layer of petroleum jelly or a silicone-based ointment. Dry wounds form thick, crusty scars. Hydrated wounds heal flatter.
Honestly, this window is boring. And that’s okay. Boring is good. Boring means you’re not messing anything up.
Silicone: The Gold Standard (For a Reason)
If you only do one thing, make it silicone. Silicone sheets or gels are the most researched scar treatment out there. They work by creating a micro-occlusive barrier — basically, they trap moisture against the skin and regulate collagen production. The result? Softer, flatter, less red scars.
Here’s the catch: consistency beats intensity. You don’t need to wear silicone sheets 24/7. But you do need to wear them daily for at least 8–12 hours. Many folks use sheets at night and gel during the day. The gel is great for contour areas — like the corners of the incisions — where sheets peel off easily.
One thing I wish someone told me? Start silicone only after the scabs are gone and the skin is fully closed. Usually around week 3 or 4. Pushing it earlier can trap bacteria and cause irritation. Slow and steady wins this race.
Massage: Awkward But Effective
Around week 6, your surgeon will likely give you the green light for scar massage. This isn’t a gentle pat — it’s a firm, targeted pressure that breaks up adhesions and prevents the scar from sticking to tissue underneath. It feels weird, honestly. Like rubbing a lumpy rope under your skin. But it works.
Use a silicone-based lubricant or vitamin E oil (patch test first — some folks are sensitive). Then, with your fingertips, apply moderate pressure in small circles along the scar line. Do this for 5–10 minutes, twice a day. You’re not trying to hurt yourself, but you should feel a deep, stretching sensation. Over time, the scar tissue softens and becomes more pliable.
Pro tip: do this after a warm shower. Heat increases blood flow and makes the tissue more responsive. And put on a podcast or something — it’s monotonous, but the payoff is real.
Sun Protection: The Silent Scar Killer
Here’s a stat that might surprise you: UV exposure can darken scars permanently, making them more visible for years. Even a little sun — like walking to your car — adds up. The collagen in scars is immature and hyper-reactive to sunlight. It produces excess melanin, turning pink lines into brown ones.
So, what do you do? Cover up. Wear a high-SPF sunscreen (SPF 50+ is ideal) on your chest every single day, even when it’s cloudy. Reapply if you’re outdoors. And for the first 12 months, consider wearing a rash guard or high-neck shirt when you’re at the beach or pool. It’s not the sexiest look, but neither is a dark, blotchy scar.
Some folks swear by physical blockers — like zinc oxide — over chemical sunscreens. They sit on top of the skin and reflect UV rays, which is gentler on healing tissue. Either works, but consistency matters more than the brand.
Advanced Options: When Topicals Aren’t Enough
Let’s say you’ve done everything right — silicone, massage, sunscreen — and your scars are still raised, thick, or itchy. Don’t panic. There are clinical interventions that can help. These aren’t for everyone, and they’re not “cheating.” They’re just tools in the toolbox.
- Steroid injections: A dermatologist injects a corticosteroid directly into the scar. It reduces inflammation and flattens hypertrophic scars. Usually needs a few sessions, spaced a month apart. Stings, but it’s quick.
- Laser therapy: Pulsed dye lasers target redness and blood vessels. Fractional lasers help with texture. Great for stubborn areas, but pricey — often $200–$500 per session, and you may need 3–5 sessions.
- Microneedling: Tiny needles create micro-injuries, which stimulates fresh collagen and remodels the scar. Some clinics use it with radiofrequency for extra oomph. Expect some downtime — your chest will look sunburned for a few days.
Talk to your surgeon or a scar specialist before booking anything. And remember: these treatments work best after 6–12 months of natural healing. Jumping in too early can backfire.
Lifestyle Factors You Might Be Overlooking
Your skin is a living organ. It heals better when you’re healthy. Sounds obvious, right? But here’s what most people miss:
- Protein intake: Collagen is made of amino acids. If you’re not eating enough protein, your body can’t build quality scar tissue. Aim for 1.2–1.5 grams per kilogram of body weight during the first few months.
- Vitamin C: This is a co-factor for collagen synthesis. Citrus, bell peppers, broccoli — or a supplement if you’re not a veggie fan. 500mg daily is a common recommendation.
- Hydration: Dehydrated skin is stiff skin. Stiff skin pulls at scars. Drink water like it’s your job.
- Sleep: Growth hormone — which drives tissue repair — is released during deep sleep. Skimping on sleep literally slows your healing.
Also, smoking? If you smoke, stop. Nicotine constricts blood vessels and starves the wound of oxygen. It’s the single worst thing for scar healing, bar none. Same with vaping, honestly.
When to Stop Obsessing
Here’s a hard truth: no scar will ever be invisible. Even with perfect technique, you’ll see a faint line up close. And that’s… fine? Actually, it’s more than fine. It’s a map of where you’ve been. A proof of what you went through to feel at home in your body.
That said, there’s a difference between accepting a scar and giving up on it. You have every right to try these techniques. Just don’t let the pursuit of “perfect” steal the joy of the result.
I’ve seen folks spend thousands on creams and lasers, and still feel unhappy because the scar isn’t a 100% match to their skin tone. Meanwhile, others with thicker scars wear them proudly, like badges of honor. The mindset shift matters as much as the treatment.
A Simple Routine That Actually Works
If you’re overwhelmed, start here. This is a bare-bones, evidence-based routine that covers 80% of the benefit:
| Timeframe | Action | Frequency |
|---|---|---|
| Weeks 1–3 | Keep incisions clean, dry, and covered with surgical tape or gauze | Change dressing as directed |
| Weeks 4–6 | Start silicone gel or sheets (after scabs fall off) | 12 hours daily |
| Weeks 6–12 | Add scar massage with silicone lubricant | 5–10 min, twice daily |
| Months 3–12 | Continue silicone + massage; strict sun protection | Daily |
| After 12 months | Assess if you need laser or steroid injections | Consult a specialist |
That’s it. No $200 creams, no miracle gadgets. Just consistent, boring, effective care.
The Emotional Side of Scar Healing
Nobody talks about this enough: scars are emotional. Every time you catch a glimpse in the mirror, you’re reminded of the surgery,